
Why Cartridge Valves Fail in Hydraulic Systems and What to Check First
When hydraulic equipment loses pressure, responds slowly, or starts running hotter than normal, cartridge valves for hydraulic systems are often among the first components worth checking. For after-sales maintenance teams, that matters because valve issues rarely stay isolated. A sticking cartridge can trigger unstable motion, repeated alarms, pump strain, seal damage, or inconsistent actuator behavior that sends technicians down the wrong path. The good news is that many failures follow recognizable patterns. If you know what to inspect first, you can cut troubleshooting time and avoid replacing the wrong parts.
In field service, the real challenge is not just identifying a failed valve. It is determining why it failed and whether the root cause is inside the valve, in the fluid, in the manifold, or somewhere else in the circuit. A cartridge valve may be the visible problem, but contamination, heat, pressure spikes, poor installation, or an incorrect replacement part are often what put it there.
For maintenance personnel working on construction equipment, machine tools, presses, material handling systems, or industrial power units, a practical approach works better than a textbook one. Start with symptoms, verify the basics, and then move deeper only if the evidence points that way.
What failure looks like in daily service
Cartridge valves do not always fail dramatically. In many cases, the machine still runs, but not in the way operators expect. You may see delayed cylinder movement, drifting loads, pressure that builds too slowly, chatter in the circuit, overheating in the reservoir, or a relief function that seems inconsistent. Sometimes the valve body itself is fine, but the poppet, spool, spring, or seals are no longer working within design conditions.
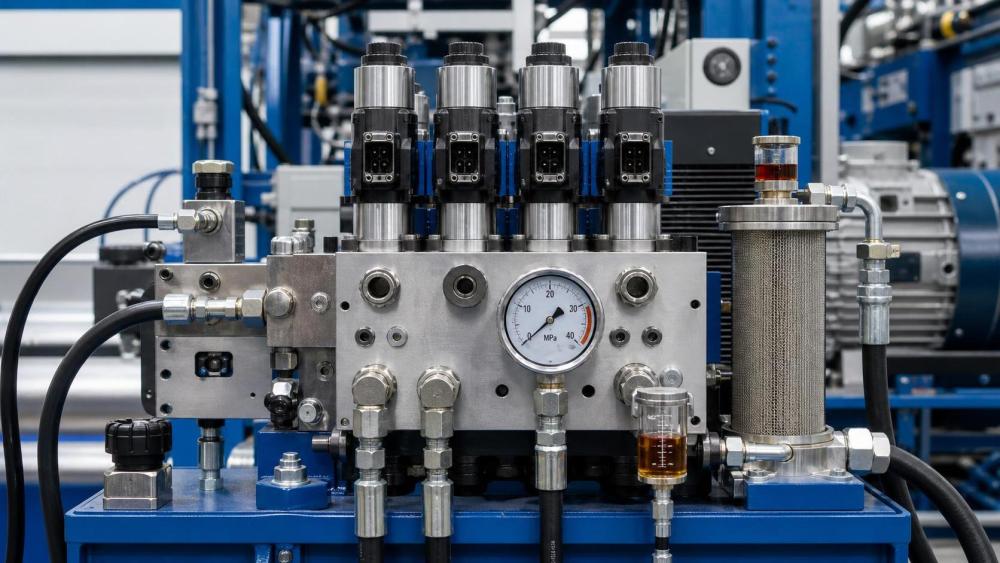
Because cartridge valves for hydraulic systems are compact and often built into manifolds, they can be easy to overlook during initial troubleshooting. A pump problem may seem likely. So may a bad cylinder or a weak actuator. Yet a partially stuck cartridge can create almost the same symptoms as a worn pump: low available force, poor repeatability, and excess heat from internal leakage.
The first things to check before removing the valve
Before pulling a cartridge from the manifold, confirm the operating conditions around it. This step saves time and prevents unnecessary disassembly.
- System pressure: Compare actual pressure with the expected setting under load and at neutral.
- Flow condition: Check whether the valve receives the flow it is supposed to control.
- Fluid temperature: High temperature can thin oil, increase leakage, and damage seals.
- Fluid condition: Look for darkened oil, varnish, water contamination, foam, or visible particles.
- Electrical command: On solenoid-operated cartridge valves, verify voltage, current, and connector condition.
- Recent maintenance history: A valve issue appearing right after filter change, hose replacement, or rebuild work often points to contamination or assembly error.
These checks are not glamorous, but they often reveal the answer early. A cartridge valve cannot regulate correctly if the pump is starving, the coil is underpowered, or the oil has turned into a contamination carrier.
Contamination is still the most common cause
If one cause deserves to be checked before anything else, it is contamination. Fine metal particles, degraded seal fragments, machining debris from new manifolds, rust, dust ingression, and varnish deposits all interfere with close-tolerance moving parts. In spool-type cartridge valves, even small particles can score surfaces or prevent full movement. In poppet-style designs, contamination may keep the seating surface from closing properly, causing internal leakage or pressure loss.
This is especially important in systems where tight tolerances and rapid response are expected. A hydraulic valve designed for accurate flow or pressure control depends on clean oil, stable clearances, and smooth internal motion. Once contamination enters the circuit, the valve may stick intermittently rather than fail completely, which makes diagnosis more frustrating.
What should you check first?
- Inspect the filter element and review its service interval.
- Cut open the old filter if failure analysis is justified.
- Examine drained oil for metallic sheen, sludge, or water separation.
- Check whether contamination is local or system-wide.
- Inspect the manifold cavity for debris left during installation or repair.
A common mistake is to clean or replace one cartridge valve and send the machine back into service without addressing the source of contamination. That often leads to a repeat failure and an unhappy customer who thinks the replacement part was defective.
Heat changes valve behavior faster than many teams expect
Overheating is not just a system efficiency issue. It directly affects valve reliability. As oil temperature rises, viscosity drops, internal leakage increases, and the hydraulic film protecting moving surfaces becomes less stable. Seals harden or shrink over time. Springs lose predictable behavior under long-term thermal stress. If varnish starts forming, spool movement can become sluggish even when the valve appears clean at first glance.
When a machine shows both slow response and high oil temperature, technicians sometimes assume the heat is only a result of heavy duty cycles. But heat may be part of the failure chain. A relief valve set incorrectly, chronic bypass flow, restricted cooling, or excessive internal leakage at a cartridge valve can all feed into the same overheating problem.
Check the reservoir temperature against normal operating range, inspect cooling performance, and compare hot-condition behavior with cold start behavior. If the valve works acceptably when cold but becomes unstable after warm-up, thermal effects and leakage should move high on the suspect list.
Installation mistakes create “bad valve” symptoms
Not every failed cartridge is truly worn out. Sometimes the valve was installed into the wrong cavity, torqued incorrectly, fitted with damaged O-rings, or replaced with a part that looks similar but has a different cracking pressure, flow rating, or function. In aftermarket service, this happens more often than many teams like to admit.
Because manifold-mounted valves are compact, model confusion is easy. Two cartridges may share similar threads and dimensions while behaving very differently in service. A relief cartridge substituted for a sequence valve, or a normally open logic element replaced by a normally closed variant, can produce pressure instability that looks like a broader hydraulic fault.
During inspection, verify:
- Part number and functional type
- Cavity specification and manufacturer compatibility
- Torque value during installation
- Seal condition, lubrication, and orientation
- Any signs of thread damage or manifold scoring
If the cavity itself is damaged, replacing the valve alone may not solve the problem. Surface defects, burrs, or out-of-round conditions in the manifold can cause leakage or sticking even with a new cartridge.
Pressure spikes and shock loads shorten service life
Hydraulic systems used in heavy equipment, industrial presses, or fast-cycling machinery rarely operate under perfectly smooth pressure conditions. Repeated spikes, shock loads, and abrupt directional changes can fatigue springs, deform sealing surfaces, and stress internal moving parts. Over time, a cartridge valve that was correctly selected for nominal pressure may still suffer if actual transient conditions are much harsher than the schematic suggests.
This is one reason why maintenance teams should ask operators about the machine’s behavior before the fault became obvious. Did movement become harsher? Was there frequent banging at end of stroke? Did someone increase settings to compensate for slow performance elsewhere? Those details often point to pressure transients that are damaging valves, hoses, seals, and actuators together.
If possible, use pressure measurement during dynamic operation rather than relying only on static gauge readings. A valve that appears fine at steady pressure may be exposed to repeated spikes during real cycles.
Coil and control-side problems can mimic hydraulic failure
For solenoid-operated cartridge valves, an electrical issue can look exactly like an internal hydraulic problem. Weak voltage, intermittent connectors, overheated coils, damaged wiring, contaminated plugs, or unstable control signals can leave the valve half-actuated or slow to shift. The result may be erratic machine movement, delayed response, or apparent loss of pressure control.
It is worth checking whether the failure is consistent or tied to vibration, temperature, or time in service. A coil that works when cold and drops out when hot can easily mislead the technician into suspecting contamination or spool wear. Measure coil resistance, verify supply voltage under load, and inspect command signals if proportional control is involved.
In many service cases, the valve is removed too early when the real issue sits upstream in the electrical control chain.
Seal failure is often a symptom, not the root cause
External leakage around a cartridge valve usually draws immediate attention, and rightly so. But a failed seal does not always mean the seal material was poor. Excess temperature, wrong fluid type, pressure pulsation, improper installation, and surface damage in the cavity can all destroy seals prematurely.
If you simply replace O-rings and backup rings without checking fluid compatibility and operating conditions, the leak may come back quickly. Look for flattened, brittle, cut, swollen, or extruded seals. Each pattern tells a different story. Swelling may suggest fluid incompatibility. Cuts may point to installation damage or sharp edges. Extrusion often indicates pressure stress or incorrect backup support.
When wear inside the valve is the real problem
Of course, cartridge valves do wear out. In systems with long operating hours, marginal filtration, or demanding duty cycles, internal clearances increase and sealing surfaces degrade. Spools may become scored. Poppets may no longer seat cleanly. Springs may weaken. In proportional or servo-related applications, very slight wear can affect performance before outright failure becomes visible.
Signs that internal wear is likely include persistent internal leakage after contamination has been ruled out, stable electrical command with unstable hydraulic response, and repeated loss of holding performance in circuits that previously behaved normally. In that situation, replacement is usually more practical than field refurbishment, especially where tight tolerances matter.
For buyers and maintenance planners, this is where structured component information becomes useful. Platforms such as IMPE help technical teams compare hydraulic and pneumatic equipment categories, understand valve function in relation to system design, and review factors like material compatibility, pressure class, and production consistency before selecting replacements or evaluating suppliers.
A practical fault-check order for after-sales teams
When time is tight and equipment downtime is expensive, a simple check order keeps troubleshooting disciplined:
- Confirm the symptom under actual operating conditions.
- Check pressure, flow, temperature, and fluid condition.
- Verify electrical command and coil performance if applicable.
- Review recent service history and any changed components.
- Inspect external leakage and manifold condition.
- Remove and inspect the cartridge only after the surrounding conditions have been checked.
- Trace root cause before installing a new valve.
This order matters because replacing the valve too early may restore function briefly without solving contamination, overheating, or pressure instability elsewhere in the system.
What experienced technicians learn to ask
Good troubleshooting is rarely only about the part. It is about context. Has the machine been operating with dirty oil after a hose burst? Did the customer use an alternative fluid? Was the valve replaced with a visually similar unit from mixed stock? Has the equipment been running hotter since a cooler issue started? Did performance degrade gradually, or fail right after maintenance?
These questions help separate root cause from surface symptom. In hydraulic service, that distinction is everything. Cartridge valves for hydraulic systems are compact, precise, and highly effective, but they depend on clean fluid, correct installation, stable operating conditions, and proper component matching. When one fails, the fastest repair is not always the smartest one.
For after-sales maintenance teams, the first inspection points are usually the ones closest to real failure patterns: contamination, heat, installation accuracy, electrical command, and pressure conditions. Check those before assuming the valve itself is the whole story. That habit not only shortens downtime; it also builds trust with customers who care less about theory and more about seeing the same machine return to service without the same problem coming back next week.
Related News
- Using Industrial Air Blow Guns to Clear Chips Without Spreading DebrisOct 15, 2026Fluid Power Control Strategist
- Ductile Iron Pipe Valves: Which AWWA Standards Apply to Water Main Projects?Oct 15, 2026Dr. Elias Vance
- Why Vacuum Suction Cups Lose Grip on MDF in Woodworking MachinesOct 15, 2026CNC Kinematics Architect
- Choosing a Variable Displacement Piston Pump Manufacturer: What to VerifyOct 15, 2026Fluid Power Control Strategist
- Parallel vs. Angular Pneumatic Grippers for Confined Assembly StationsOct 15, 2026Fluid Power Control Strategist
- Die Castings vs. Investment Castings: Which Costs Less at Your Production Volume?Oct 14, 2026Foundry Phase-Change Fellow